school-coding-lab
Building a Student Developer Machine on Raspberry Pi
This page details the steps for setting up a Raspberry Pi board for as a web-based development workstation. Some knowledge of Raspberry Pi is assumed, but most steps should have plenty of detail for the first time user. The procedure is tested on a Raspberry Pi 3, but any higher revisions will work just as well. Raspberry Pi 1 and 2 boards are not compatible with 64-bit software and should not be used.
The steps here will require the following:
- A PC or Mac with a microSD card slot (or appropriate adapter.)
- A network connection (WiFi or RJ-45, depending on model of Raspberry Pi.)
- Access to the internet.
💡 If your Raspberry Pis were donated and you’re not sure what you’ve got, see the page for how to identify your Raspberry Pi.
Summary of the Process
There are three steps to go from a newly acquired Raspberry Pi and microSD card to a functioning MicroPython development environment students can use.
- Format the microSD card with the latest 64-bit Rasperry Pi OS Lite using Raspberry Pi Imager.
- Boot the Pi.
- Download and run the automated configuration script.
If you’re familiar with Raspberry Pi and using the Linux command prompt, this might be enough to go on. Just be sure to set up a user called ‘admin’ in the Raspberry Pi imager options. If you want more detail, including screenshots, keep reading.
Step 1: Creating a Raspberry Pi OS MicroSD Card
Raspberry Pi Operating System installation is different than a typical PC or Mac. The procedure for Raspberry Pi is to write an operating system image to a microSD card and then use the microSD card to boot the device. This requires the following steps:
- Installing and running the Raspberry Pi Imager tool.
- Configuring Raspberry Pi Imager options.
- Writing the OS image.
🕗 Creating the OS image takes about eight to ten minutes in total.
Installing and Running the Raspberry Pi Imager
You’ll need a PC, Mac, or Linux machine with access to the internet for these steps. You may skip this if Raspberry Pi Imager is already installed.
- Visit https://www.raspberrypi.com/software/ to download the version of the tool for your operating system.
- Install the tool by double-clicking the installer file.
- To run the tool, find Raspberry Pi Imager in the list of installed applications for your PC.
If this isn’t your first experience with Raspberry Pi Imager, go ahead and scroll down to the section entitled Booting Your Raspberry Pi.
Understanding the Raspberry Pi Imager
If this is your first time using Raspberry Pi Imager, learn more about it by reading and watching the short video on the Raspberry Pi Imager announcement page. Keep in mind there have been improvements made to the tool since the video was published, so things will look slightly different. This differences will be highlighted in the procedure below.
Selecting the Appropriate Options for the Raspberry Pi Imager
There are three things you must choose to create a microSD card for use with your Raspberry Pi. There is also a fourth grouping of options that will pre-configure the system for you.
- Choose the Raspberry Pi device. Because there are several generations of Raspberry Pi, it’s important to get this right.
- Choose an Operating System. In nearly all cases, you will want to use Raspberry Pi OS Lite 64-bit.
- Choose the storage device. This is the easiest step. It is the microSD card on your system and is often the only device in the list.
- Choose additional configuration options. Press CTRL + SHIFT + X to bring up the super secret options page. Visit each tab and fill in as appropriate.
The OS Customization General Tab
Careful consideration of the information on the General tab can make your life much easier, so don’t skip it.
- Set hostname determines what the machine will be called. It can be almost anything you want, but it should be no more than a dozen or so alphanumeric characters and it must be unique (i.e. you can’t name everything raspberrypi.)
- Set username and password is used to create the first user account. Make sure the username is set to admin since this is what is required for the remaining installation steps. The password cannot be blank. Anything around eight characters is fine.
- Configure wireless LAN will ger you automatically connected to the network you specify. Don’t forget to set the country code in addition to the SSID and password.
- Set locale settings makes sure you’re in the right time zone and your clock is correct. It also ensures you don’t get strange characters from your keyboard by configuring for your language.
Once the information is entered, you have the option to save it. This makes it faster to create multiple microSD cards if you have more than one Pi.
The OS Customization Services Tab
Under the Services tab, be sure to enable SSH and select the option to use password authentication. This will allow advanced admins to connect to the host without a monitor and keyboard if desired.
The OS Customization Options Tab
Options on this tab are for convenience, mainly. The eject option means you won’t have to go through the “safely remove this device” process before transferring the microSD card from the computer to the Raspberry Pi.
Raspberry Pi Imager Screenshots
If a picture is worth a thousand words, this section is money in the bank. These screenshots give some examples of what to expect while using the Raspberry Pi Imager. Choices shown are for Raspberry Pi 3 hardware, but it works the same for Raspberry Pi 4.
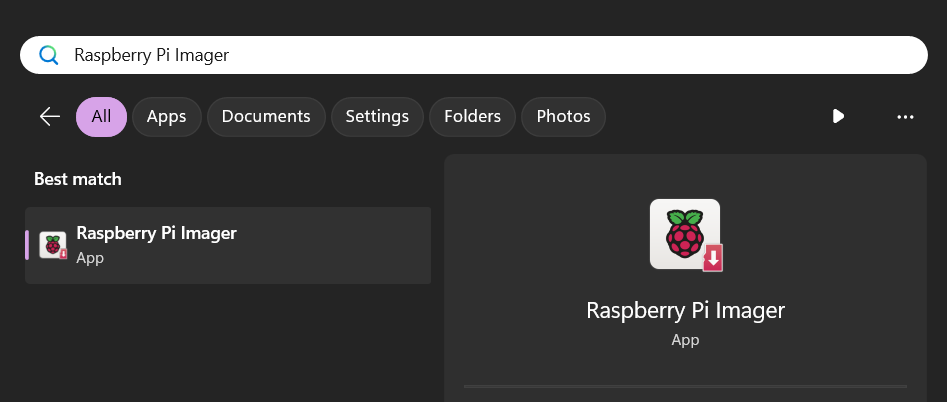
Figure 1: Finding the app (Windows OS example)
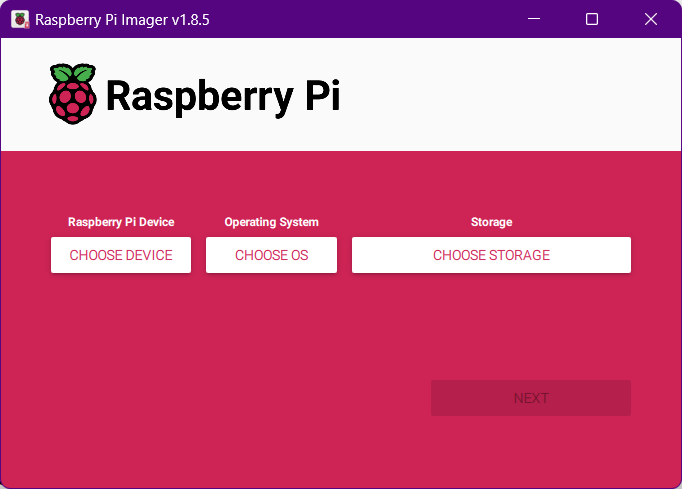
Figure 2: Raspberry Pi Imager started up and awaiting your choices
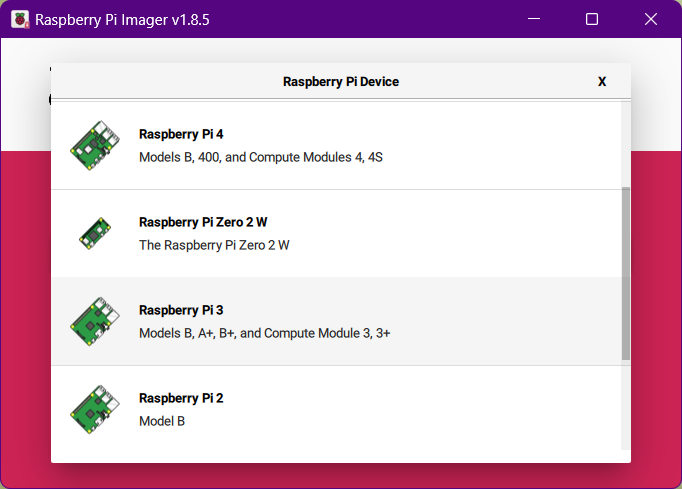
Figure 3: Choosing a device of Raspberry Pi 3
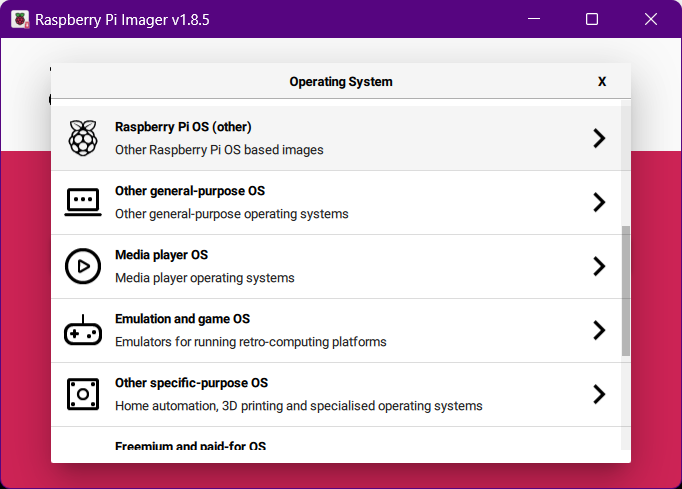
Figure 4: Choosing Raspberry Pi OS (other)
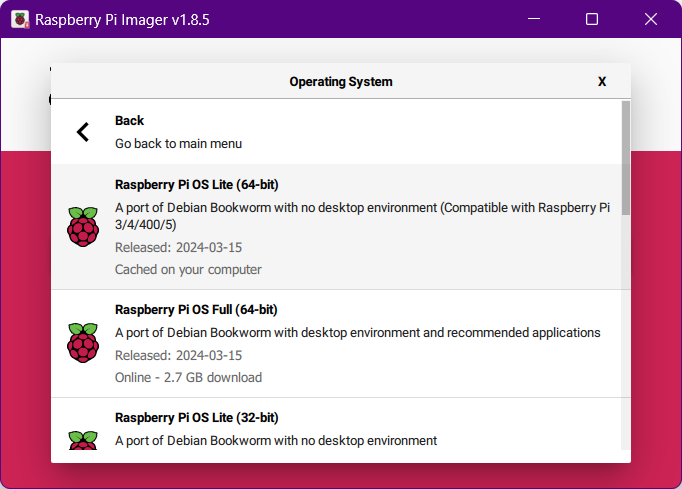
Figure 4: Choosing an operating system of Raspberry Pi OS Lite (64-bit)
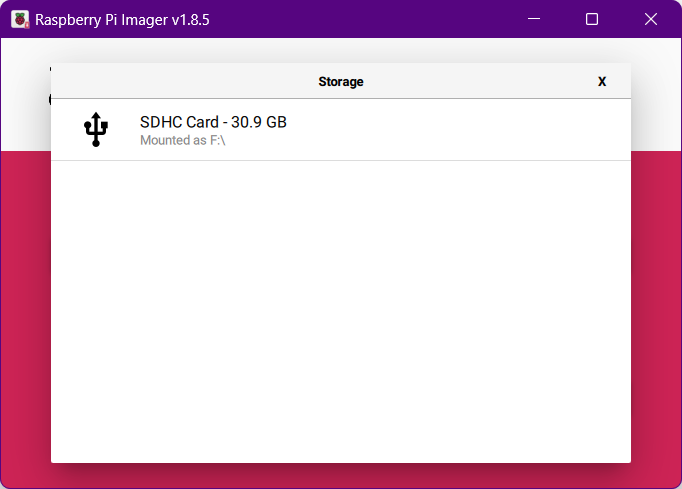
Figure 5: Choosing the microSD card
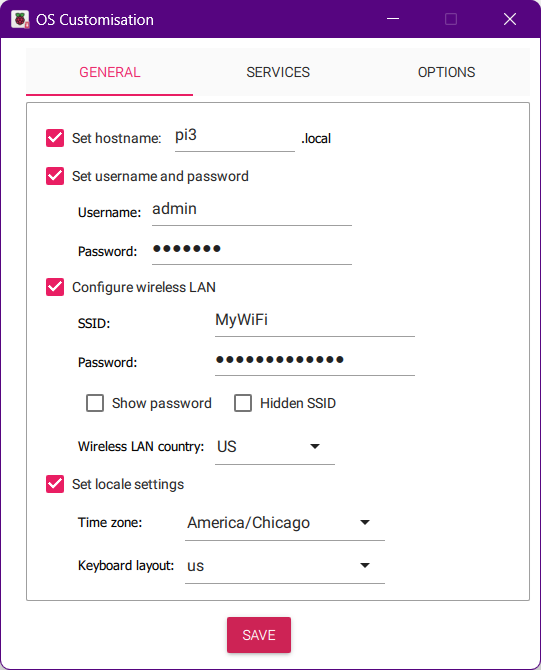
Figure 6: The General tab of customization (CTRL + SHIFT + X)
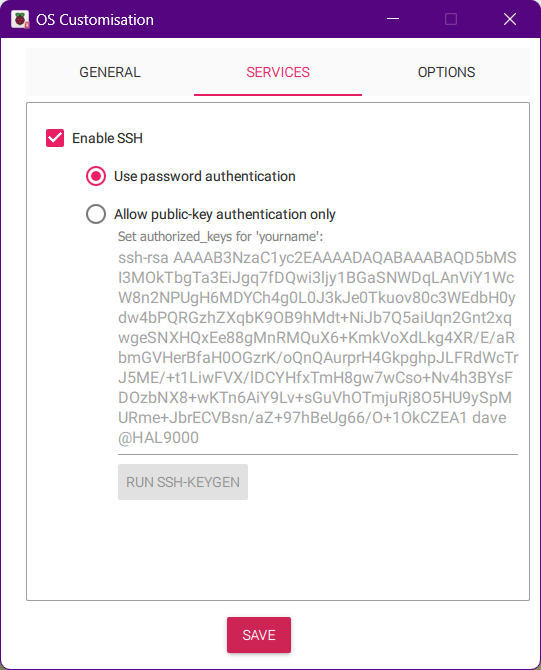
Figure 7: The Services tab for enabling Secure Shell (SSH) remote connections
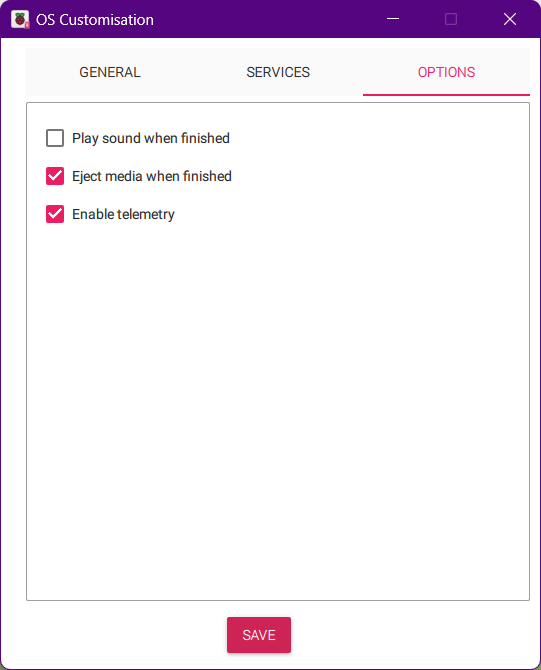
Figure 8: Default options showing the microSD will be ejected when writing is finished
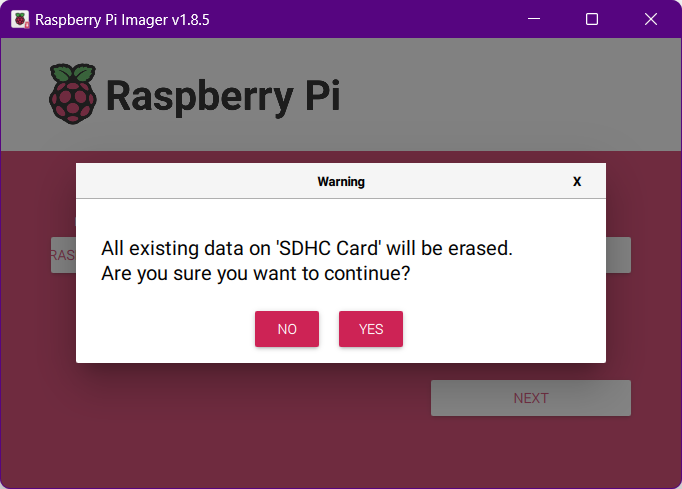
Figure 9: Waiting for confirmation to overwrite
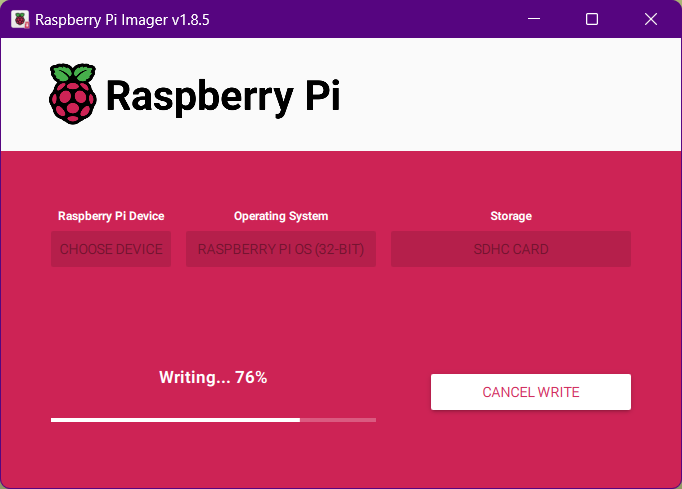
Figure 10: Raspberry Pi Imager writing Raspberry Pi O.S. to microSD card
Step 2: Booting Your Raspberry Pi
After writing the Raspberry Pi OS image, you can remove the microSD card from your PC and insert it into the slot on the Raspberry Pi.
Always ensure the Raspberry Pi is not plugged into power when you insert or remove the microSD card.
- Insert the microSD card into the slot taking care to orient it the correct way.
- Attach an HDMI monitor with the appropriate cable for your device (standard or micro HDMI).
- Plug in an appropriate power supply for your device (Official Raspberry Pi or Canakit power supplies are a good choice.)
- Watch the monitor for signs of life.
🕒 Booting takes about three minutes the first time. If you see a Raspberry Pi Desktop logo on the monitor, things are moving in the right direction. Just be patient.
Step 3: Configuring the Operating System
Raspberry Pi OS will boot to text-based login prompt. You can log in as the admin user you configured in the OS Customization, General tab of the Raspberry Pi imager tool. From here, you’ll run a couple of commands that will automate the configuration of the operating system and its applications.
💡 Advanced users can start a Secure Shell (SSH) session from a remote machine and log in as the preconfigured user.
From the terminal window, you’ll need to download and run a script from the school-coding-lab GitHub site using the following commands:
wget https://raw.githubusercontent.com/DavesCodeMusings/school-coding-lab/main/rpi/fleet-automation/quickstart_dev_workstation.shbash ./quickstart_dev_workstation.sh
It will take a while to run and it will take care of the following tasks for you:
- Creating a non-administrator login id for students to use.
- Copying lab documents to the Raspberry Pi.
- Installing software necessary for Python and MicroPython code development.
- General clean-up of Raspberry Pi O.S.
🕗 The automated configuration process takes about ten to fifteen minutes in total.
When everything is done, you can reboot the Raspberry Pi and you’re ready to go.
A successful run of the steps will look something like what’s shown below, though large chunks of output have been removed for brevity.
admin@pi:~ $ wget https://raw.githubusercontent.com/DavesCodeMusings/school-coding-lab/main/rpi/fleet-automation/quickstart_dev_workstation.sh
...
Saving to: ‘quickstart_dev_workstation.sh’

admin@pi:~ $ bash ./quickstart_dev_workstation.sh
--2024-06-15 08:03:30--  https://github.com/DavesCodeMusings/school-coding-lab/raw/main/rpi/fleet-automation/install_ansible.sh
Resolving github.com (github.com)... 140.82.112.3
Connecting to github.com (github.com)|140.82.112.3|:443... connected.
HTTP request sent, awaiting response... 302 Found
...
Checking for Ansible.
Installing the Ansible automation software package...
...
Unpacking ansible (7.3.0+dfsg-1) ...
...
Setting up ansible (7.3.0+dfsg-1) ...
...
[WARNING]: No inventory was parsed, only implicit localhost is available
[WARNING]: provided hosts list is empty, only localhost is available. Note that
the implicit localhost does not match 'all'
...
PLAY RECAP *********************************************************************
localhost                  : ok=16   changed=5    unreachable=0    failed=0    skipped=1    rescued=0    ignored=0

Everything is done but the reboot. Restart now [y/N]? y

Broadcast message from root@pi on pts/1 (Sat 2024-06-15 08:27:00 CDT):

The system will reboot now!
Next Steps
Congratulations on getting your Raspberry Pi configured. And give yourself an extra pat on the back if you upcycled an older, discarded Pi for this purpose.
Now you’re ready to explore MicroPython programming on microcontrollers.